Adding & Managing Prescriptions
When veterinarians prescribe medications for your animals, you can enter the specific details from the prescriptions into TYR using the Prescriptions feature. This feature enables you to enter a prescription for one animal and also for multiple animals of the same Animal Type when the prescription is the same for all of them. After you enter the prescriptions, you can view the prescription details for individual animals and delete prescriptions as needed.
Important Notes:
(1) You cannot edit an existing prescription in TYR, so be sure to enter the details of a new prescription carefully. After you enter and save a new prescription, if you realize you've made a mistake, you can delete the prescription and reenter it.
(2) You can also use this feature to record non-prescription medications if you want the system to create automatic future reminders.
This page describes the following procedures:
-
On the TYR Home screen under Modules, click Animals to open the Manage Animals screen.
-
In the center grid, locate the animal for which the prescription is intended and select the record by clicking the cell at the farthest left on the row containing the animal's information.
-
On the right side of the screen under Animal Health, click the Prescriptions button to open the Manage Prescriptions screen.
-
Click the Add New Prescription button (
 ) to open the Prescribe Meds screen.
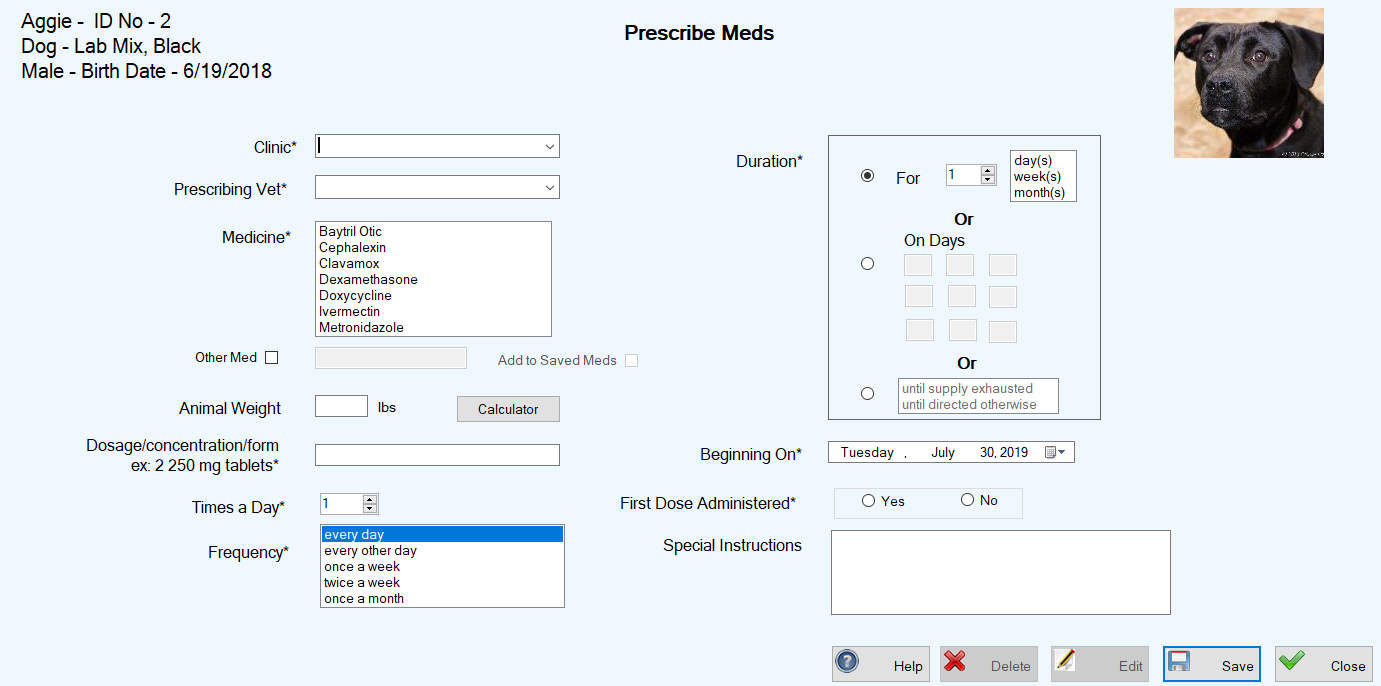
The details for the selected animal appear in the upper left corner of the screen.
-
In the Clinic field, type the name or select one from the drop-down list that was created from the PCO records for companies or organizations for which you selected the "Animal Clinic or Hospital" checkbox.Important Note:The system does not create a PCO record for a new clinic name that you type in manually, so if you expect to use this clinic name again, we recommend creating a new PCO record for the clinic as soon as you finish entering the vaccination for this animal so you won't forget to do it.)
-
In the Prescribing Vet field, type the name of the veterinarian who prescribed the medication or select a name from the drop-down list that was created during system setup for Adding & Managing Veterinarians.
-
In the Medicine field, select a medication from the list. If the prescribed medication does not appear in the list, skip this step and go to Step 8.
-
If the prescribed medicine does not appear in the Medicine list, select the "Other Med" checkbox and type the name of the medication in the field to the right of the checkbox.
Note: If you want the new medication to be available for future selection in the Medicine field, select the "Add to Saved Meds" checkbox. To include additional information about the medication for future reference, go to the procedure for Adding & Managing Medicines.
-
If the dosage is based on the animal's weight, enter the current weight in the Animal Weight field. (Note: Any weight you enter in this field will be added to the animal's weight history.)
-
Enter the dosage from the prescription in the Dosage/concentration/form field, using the provided example as a guide (e.g., two 250 mg tablets).Note: If a measured dosage must be based on the animal's weight, you can click the Calculator button to open the Microsoft Windows calculator, where you can use the weight you entered in Step 9 above as one of the factors in your calculation.
-
In the Times a Day field, type the number or use the up and down arrows to select the number according to the prescription.
-
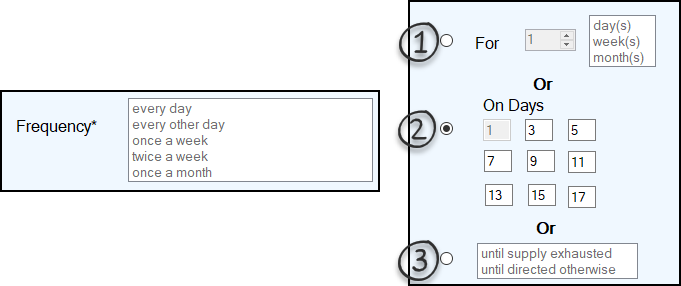
From the prescription, determine the entries you need to make in the Frequency and Duration fields. These fields are related, so the selections you make in one affect the other.
-
When you select a Frequency (e.g., every day or once a week), you can select only Duration options 1 and 3.
-
For Duration option 1, select day(s), week(s), or month(s) and type or use the up and down arrows to select the number.
-
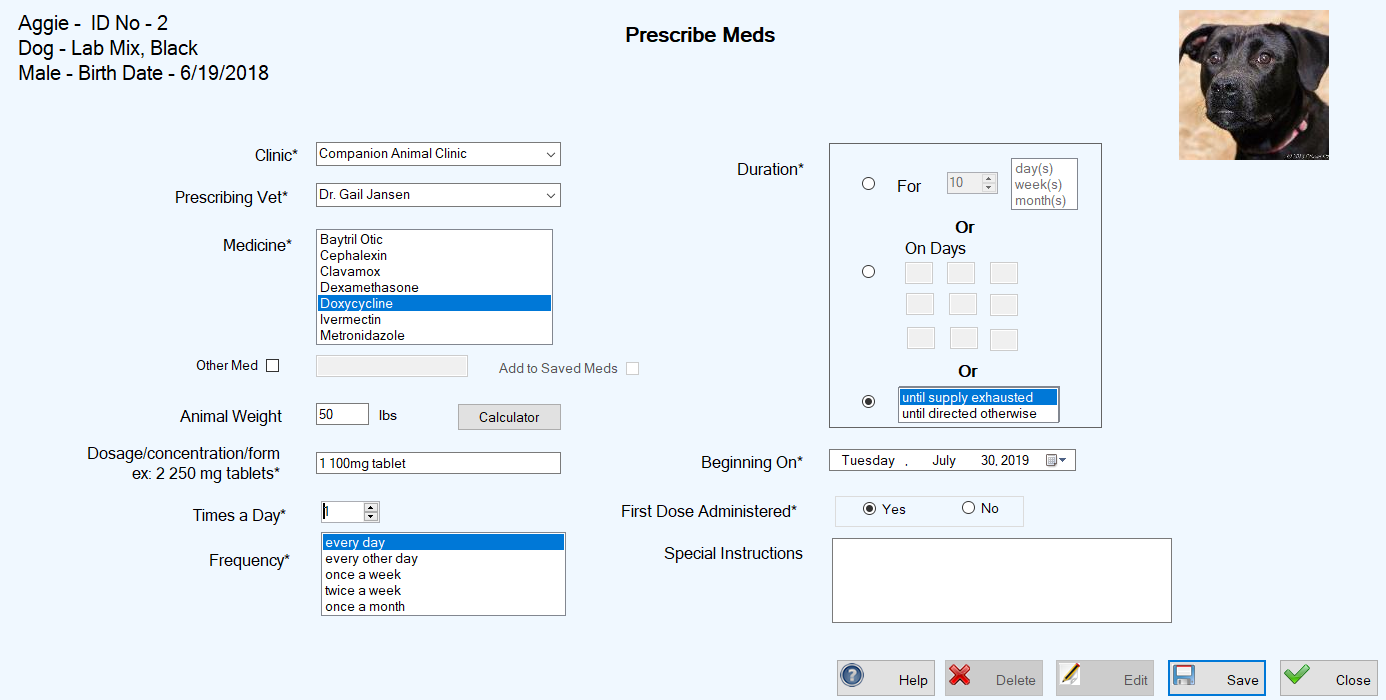
For Duration option 3, select either "until supply exhausted" or "until directed otherwise."
-
When you select Duration option 2, the Frequency field becomes inactive because Duration option 2 is essentially a Frequency designation.
-
For Duration option 2, enter numbers in the fields to designate the days on which the medication is to be administered.
13. In the Beginning On field, indicate the date you started or will start administering the prescribed medication. This field will accept past, present, and future dates.
14. In the First Dose Administered field, if you selected today's date in the Beginning On field, you must indicate whether or not the first dose has been administered.
IMPORTANT NOTE REGARDING STEPS 12 THROUGH 14:
TYR examines the entries you make in Steps 12 through 14 and automatically generates one or more reminders accordingly. For detailed information about these and other automatic and user-created reminders, go to the REMINDERS section.
TYR examines the entries you make in Steps 12 through 14 and automatically generates one or more reminders accordingly. For detailed information about these and other automatic and user-created reminders, go to the REMINDERS section.
15. If you wish, use the optional Special Instructions field to enter any additional information you feel is important regarding the prescription.
16. Click Save. You will see a confirmation popup, giving you the opportunity to click "No" and return to the Prescribe Meds screen to correct any erroneous entries before finalizing the record of this prescription.
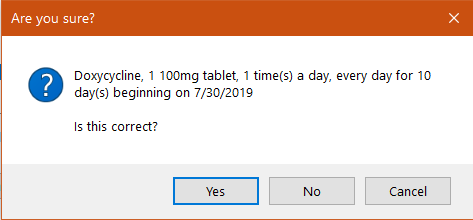
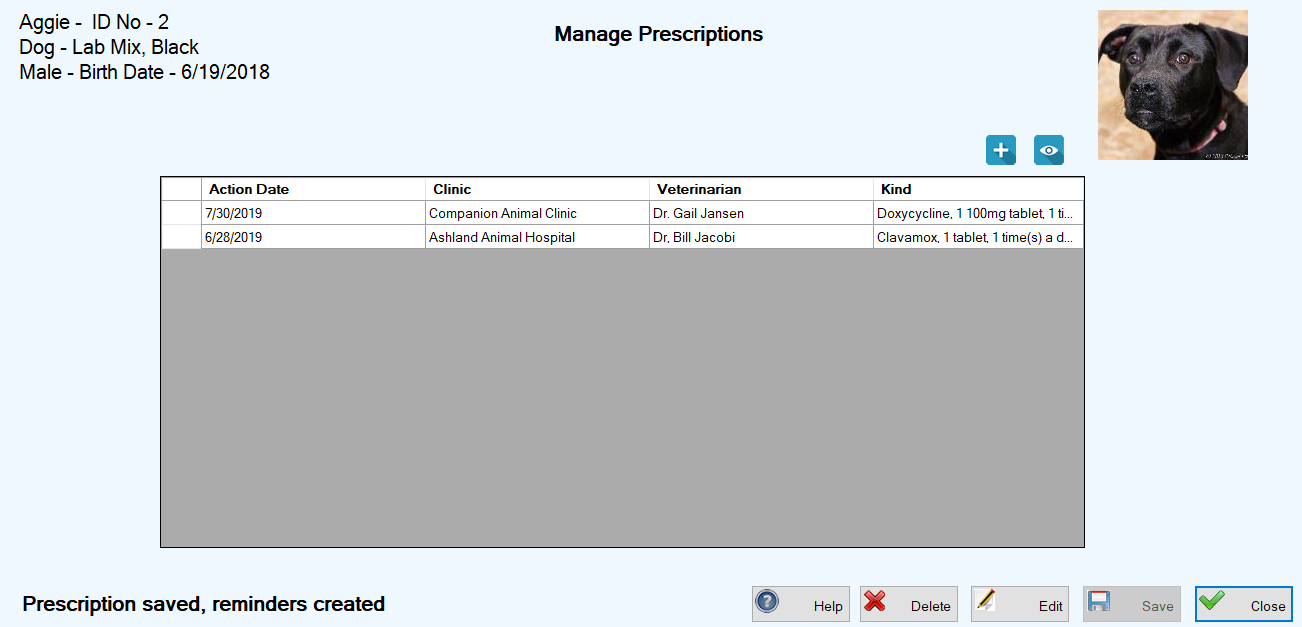
17. To finish saving the prescription record, click "Yes." You are returned to the Manage Prescriptions screen where the new prescription appears in the center grid, along with a confirmation message about the prescription and its related reminders in the lower left corner of the screen.
Top of Page
Top of Page
-
On the TYR Home screen under Modules, click Animals to open the Manage Animals screen.
-
In the center grid, select the animals that received the vaccination(s):
TO SELECTDO THISMultiple animals adjacent to each otherClick the cell to the left of the uppermost animal you want to select, hold down the Shift key on your keyboard, and then click the cell to the left of the bottommost animal you want to select.Multiple animals not adjacent to each otherClick the cell to the left of the uppermost animal you want to select, hold down the Ctrl key on your keyboard, and then click the cell to the left of each additional animal you want to select.
Note: Multiple animals must be the same type (e.g., all dogs or all cats), so look at the Animal column in the center grid when making your selections.
-
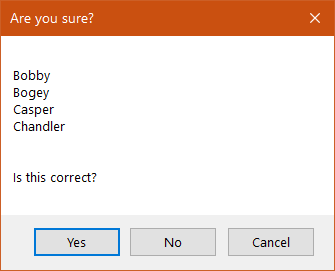
On the right side of the screen under Animal Health, click the Prescriptions button. A confirmation popup appears, displaying the names of the animals you selected.
-
If these names are not correct, click No to return to the Manage Animals screen to repeat Steps 2 and 3.
If the names are correct, click Yes to continue. The Prescribe Meds screen appears, allowing you to record the same prescription information for all selected animals whose names appear in the upper left corner of the screen.
-
Perform Steps 5 through 16 above for Adding a Prescription for One Animal, skipping Step 9 because the Animal Weight field is inactive when multiple animals have been selected.
-
To finish saving the prescription records for all the selected animals, click "Yes" when you see the confirmation popup in Step 16. You are returned to the Manage Animals screen where the animals you selected are still highlighted in the center grid, and a confirmation message about the prescription and its related reminders appears in the lower left corner of the screen.
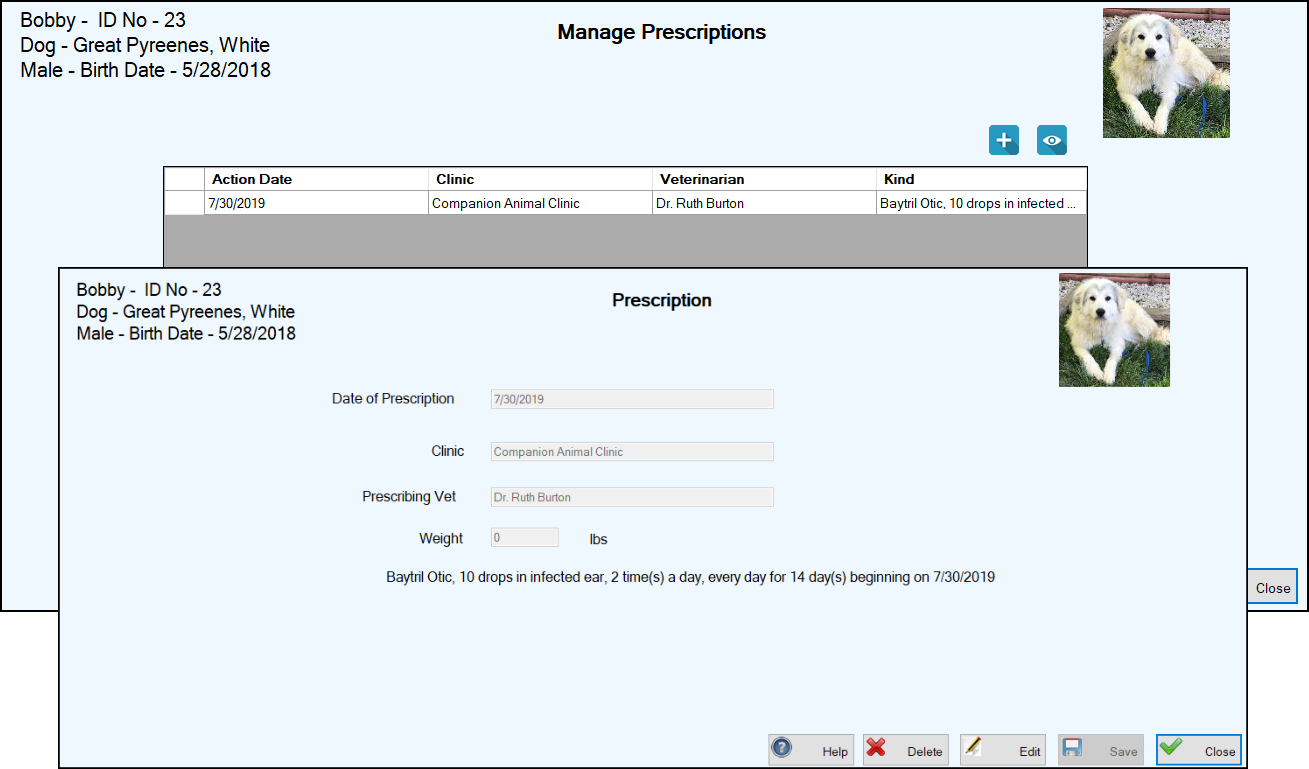
Note: You can select an individual animal on the Manage Animals screen and click the Prescriptions button to access the Manage Prescriptions screen to view details of the new prescription you just added.
-
On the TYR Home screen under Modules, click Animals to open the Manage Animals screen.
-
In the center grid, locate the animal for which the prescription is intended and select the record by clicking the cell at the farthest left on the row containing the animal's information.
-
On the right side of the screen under Animal Health, click the Prescriptions button to open the Manage Prescriptions screen.
-
In the center grid, select the prescription you want to delete by clicking the cell at the farthest left of the row.
-
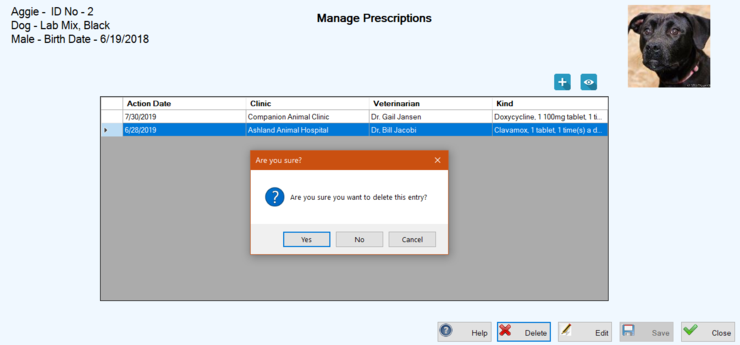
Click the Delete button. A confirmation popup appears.
-
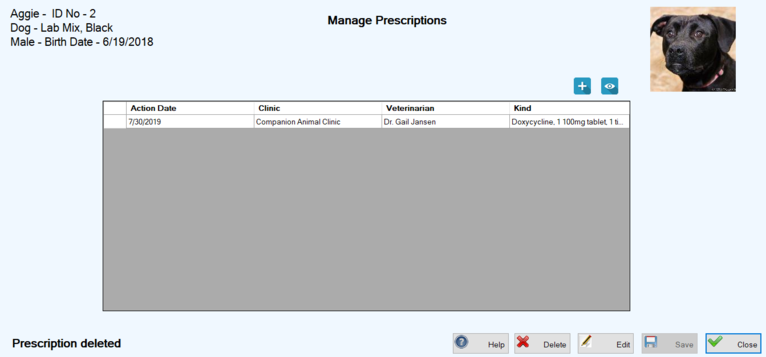
To complete the deletion, click "Yes." You are returned to the Manage Prescriptions screen where the deleted prescription no longer appears in the center grid and a confirmation message appears in the lower left corner of the screen.
Top of Page