Adding & Managing Volunteer Assignments
TYR makes it easy to include volunteering information in your PCO records. The first step is to customize your system by creating Volunteer Activities. Then you can follow the procedures on this page to establish an existing PCO as a Volunteer and assign one more more Volunteer Activities, also known as Assignments, to the PCO. (Note: If the person who has agreed to volunteer is not already in your database, you must first create a new PCO record for the person.)
This page also includes instructions for editing a PCO's Volunteer Assignments and changing the status of a volunteer from Active to Inactive and vice versa.
-
On the TYR Home screen under Modules, click the People, Companies, Organizations button to open the Manage People, Companies, and Organizations screen.
-
Use one of these methods to select the PCO you want to connect to an event:
- With the scroll bar on the right side of the center grid, scroll down until you find the row containing the PCO's information, and then click the leftmost cell on that row.
OR
- In the Show field to the left of the center grid, select People or Companies and Organizations, and then in the Last Name field above the center grid, begin typing the letters of the PCO's last name or organization name until the only item appearing in the center grid is the desired PCO, indicating it is selected because the row is highlighted and has an arrow in the leftmost cell.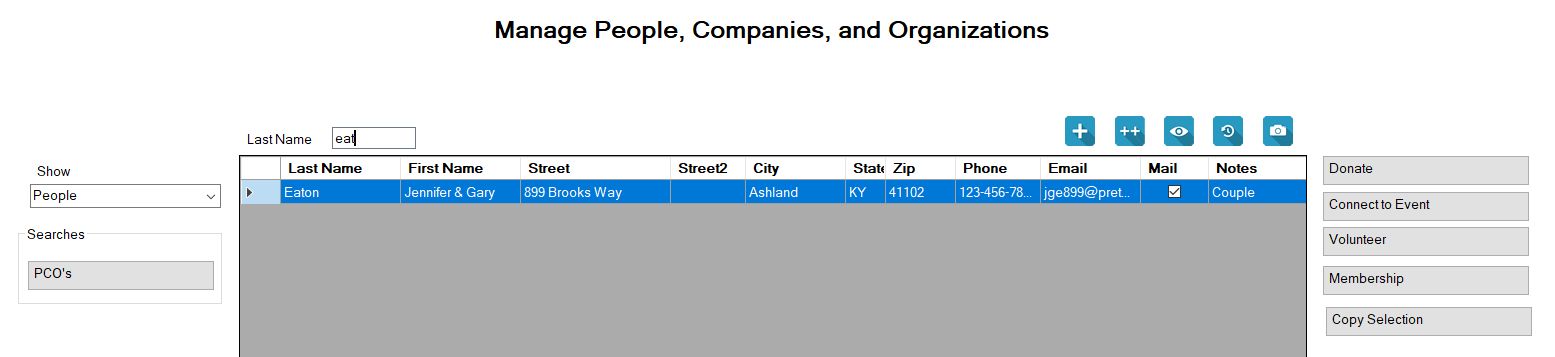
-
With the desired PCO selected, click the Volunteer button to the right of the center grid near the top to open the Volunteer screen.If the PCO is not yet a Volunteer, the screen defaults to Active status and shows today's date in the Date Active field.
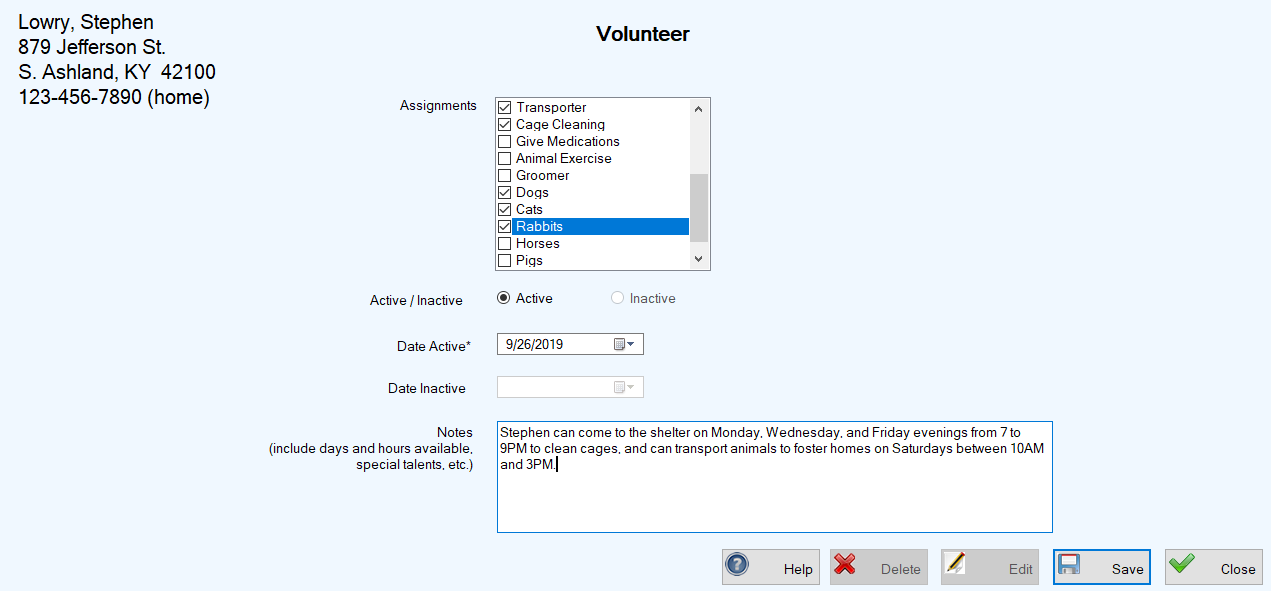
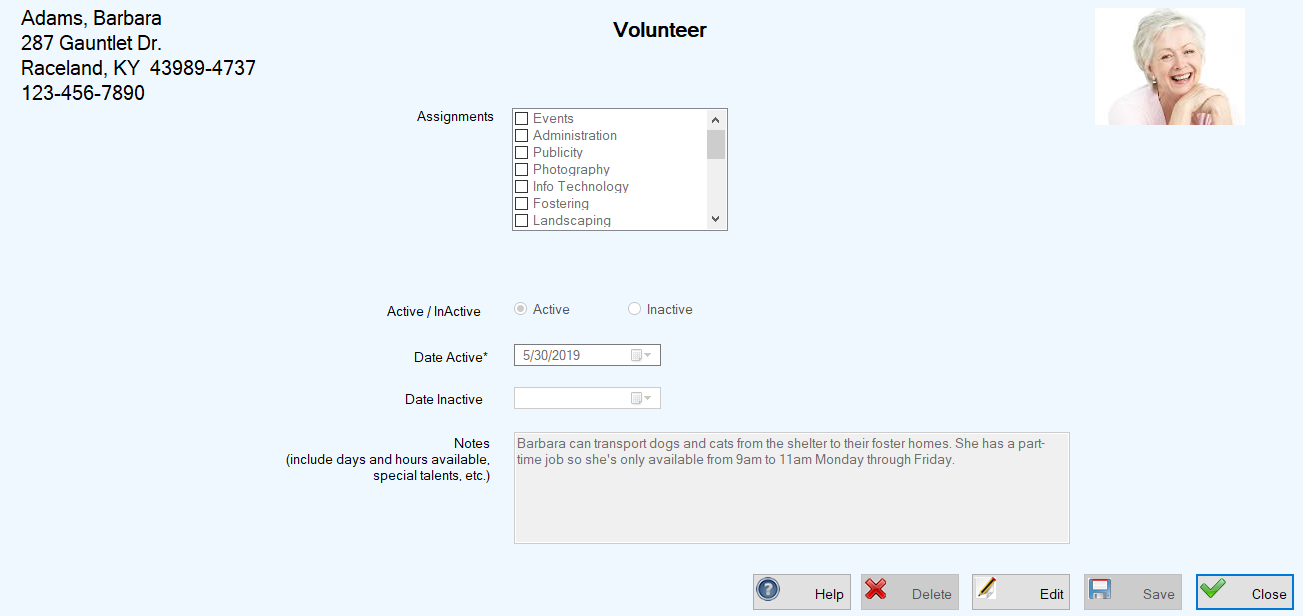
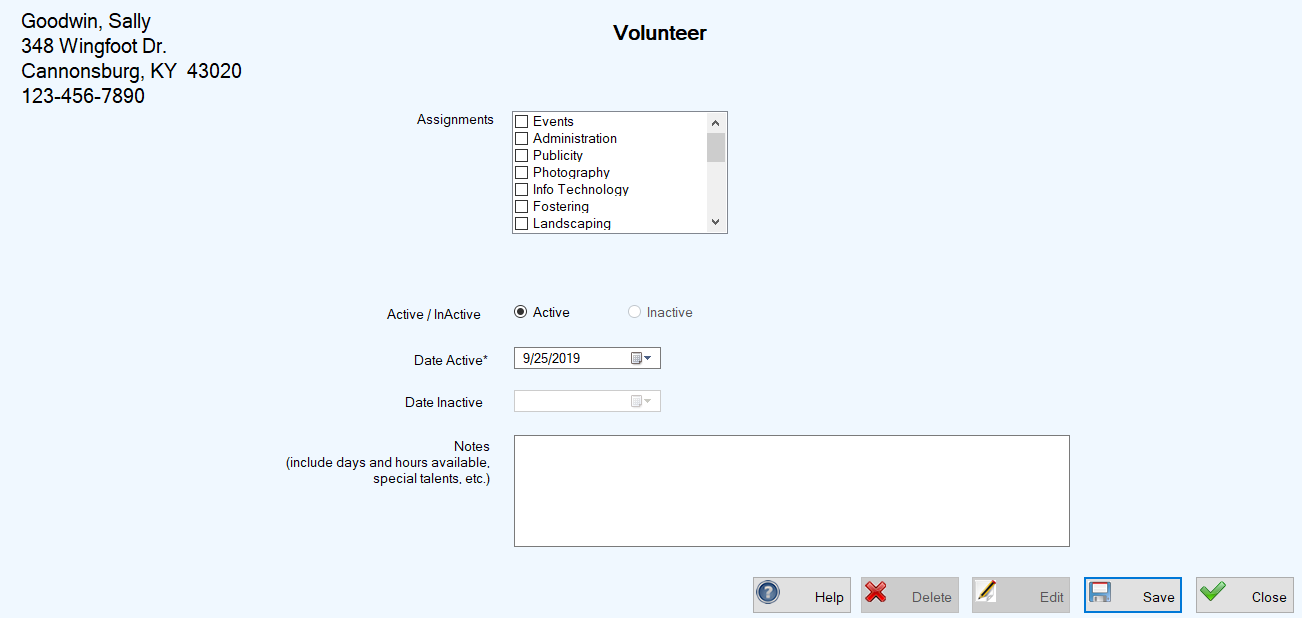 If the PCO is already designated as a Volunteer, the screen will display the the Active or Inactive status, relevant date(s), and any existing Notes. The checkboxes for any Assignments associated with the volunteer might not be visible until you click the Edit button to activate the scroll bar within that field.
 -
In the Assignments field, click the checkboxes beside all Assignments for which the PCO has agreed to volunteer, including any Animal Types for which the PCO has expressed a preference. (Note: In the instructions for Creating & Managing Volunteer Activities, we recommend including some or all of your Animal Types so you will be able to specify the type(s) of animals with which each volunteer prefers to work.) Use the scroll bar on the right side of the field to navigate through the Assignments list.
-
In the Active/Inactive field, leave the setting at Active.
-
The Date Active field defaults to today's date. If the date the PCO became a volunteer is different, type in or use the Date Picker to select the date.
-
In the optional Notes field, enter all helpful information about the volunteer, including days and hours available, special preferences and talents, etc. Your screen will now look something like this:
-
Click the Save button. You are returned to the Manage People, Companies, and Organizations screen where the PCO is still selected and a confirmation message appears in the lower left corner of the screen.
Note: You can also find instructions for Viewing & Editing Volunteer Records in the Volunteers section of this User Guide.
-
Follow Steps 1 through 3 above for Establishing an Existing PCO as a Volunteer.
-
On the Volunteer screen for the selected PCO, click the Edit button to make all fields editable.
-
In the Assignments field, select and/or deselect Assignments as needed.
-
Leave the Active/Inactive and Date Active fields as they are.
-
Add any relevant notes in the Notes field. (Note: The Notes field doesn't show the date you entered the note, so you might want to preface your notes with the date of entry.)
-
Click Save. You are returned to the Manage People, Companies, and Organizations screen, where the PCO is still selected and a confirmation message appears in the lower left corner.
-
Follow Steps 1 through 3 above for Establishing an Existing PCO as a Volunteer.
-
On the Volunteer screen for the selected PCO, click the Edit button to make all fields editable.
-
In the Active/Inactive field, select the desired status.
If you are changing from Active to Inactive, when you select the Inactive button, today's date will appear in the Date Inactive field and the Date Active will become greyed out.If you are changing from Inactive to Active, when you select the Active button, the Date Inactive field becomes blank and the original date in the Date Active field remains. Note: In this case, you might want to change the date to coincide with the date the volunteer actually became active again, and add an explanation in the Notes field.
-
Add any helpful information in the Notes field.
-
Click Save. You are returned to the Manage People, Companies, and Organizations screen, where the PCO is still selected and a confirmation message appears in the lower left corner.