Adding & Managing PCO Records
This page contains instructions for adding a single PCO record, adding up to four PCO records at the same time, editing, and deleting PCO records.
To Add a Single PCO Record
-
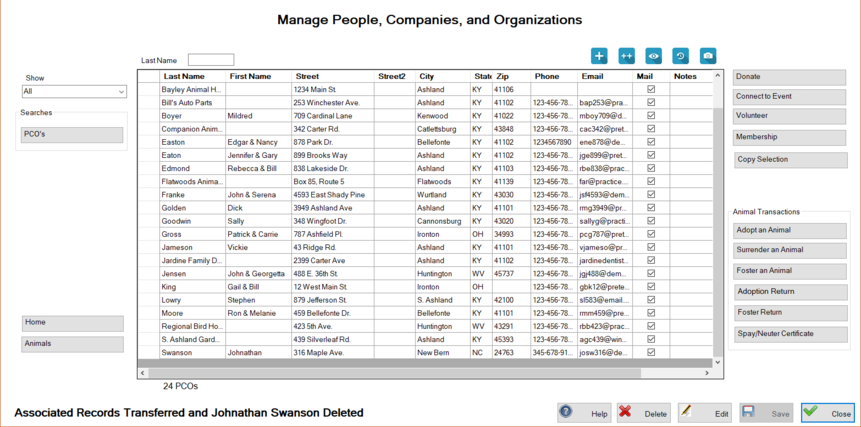
On the TYR Home screen under Modules, click the People, Companies, and Organizations button. The Manage People, Companies, and Organization screen opens.
-
Click the Add New PCO (
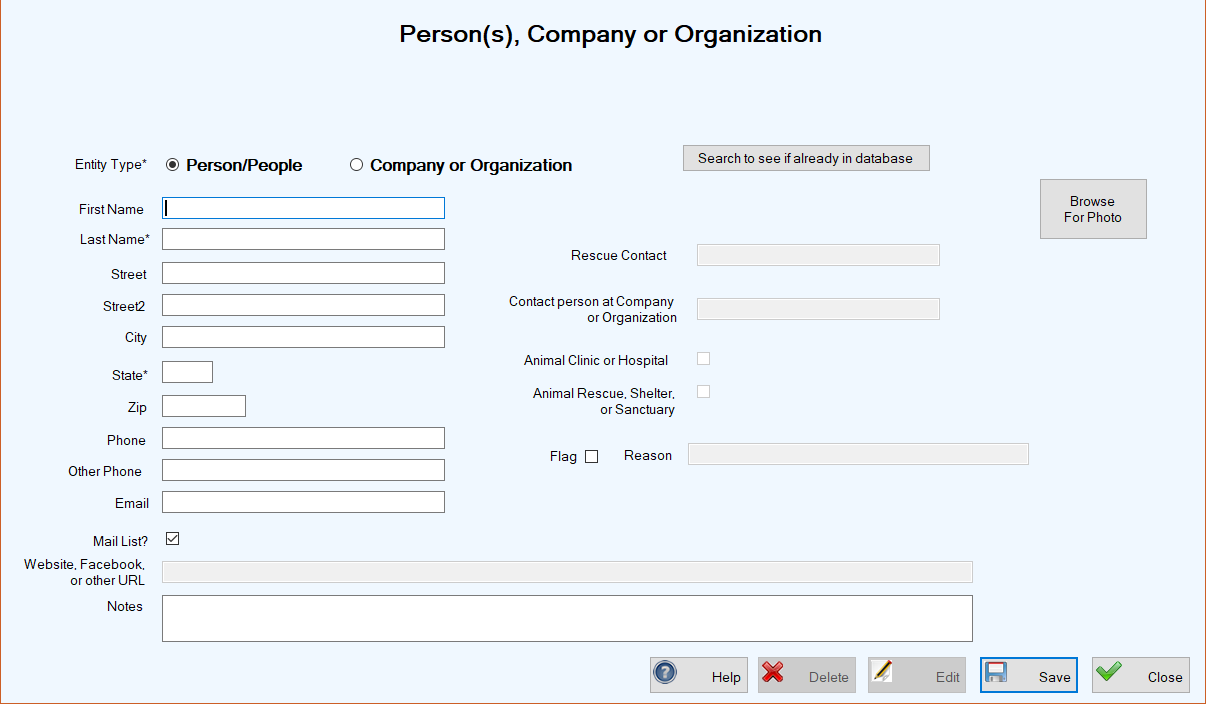
 ) button. The Person(s), Company, or Organization screen opens.
-
Click the Search to see if already in database buttonto open the Search People, Companies, and Organizations screen where you can perform a search to determine whether or not a record for this entity already exists.
Important Note:
If you find a record with slightly different information than what you planned to enter and you know it's for the same entity, change the information in the existing record to what you believe to be the most correct, and do not create a new record. This will help prevent future problems with duplicate records.
-
Select the Entity Type: Person/People for individuals, couples, and families; Company or Organization for non-profit and for-profit businesses; clubs and associations; other rescues, shelters, and sanctuaries; animal hospitals and clinics.
-
Follow TYR system protocol for entering the entity's name in the active Name fields. If you selected the Person/People Entity Type, make entries in the First Name and Last Name fields. If you selected the Company or Organization Entity Type, enter the information in the Name field.
-
In the Street and Street2 fields, enter the complete mailing address. (This could be a P.O. Box number instead of a regular address.) Use the Street2 field for additional address information such as Suite, Apartment, or Lot Number that will ensure any mailings reach the intended recipient.
-
Enter the City name, State abbreviation, and Zip code. (Note: You can save keystrokes here by setting up Auto Completes - Cities.)
-
Enter Phone number(s) and Email address for future contact purposes.
-
For the Mail List? selection, the system automatically selects the checkbox because we assume every PCO you add to your database is a potential contributor. If for some reason you need to exclude this PCO from mailings, simply deselect the checkbox and the PCO will not appear on any contact or mailing lists.
-
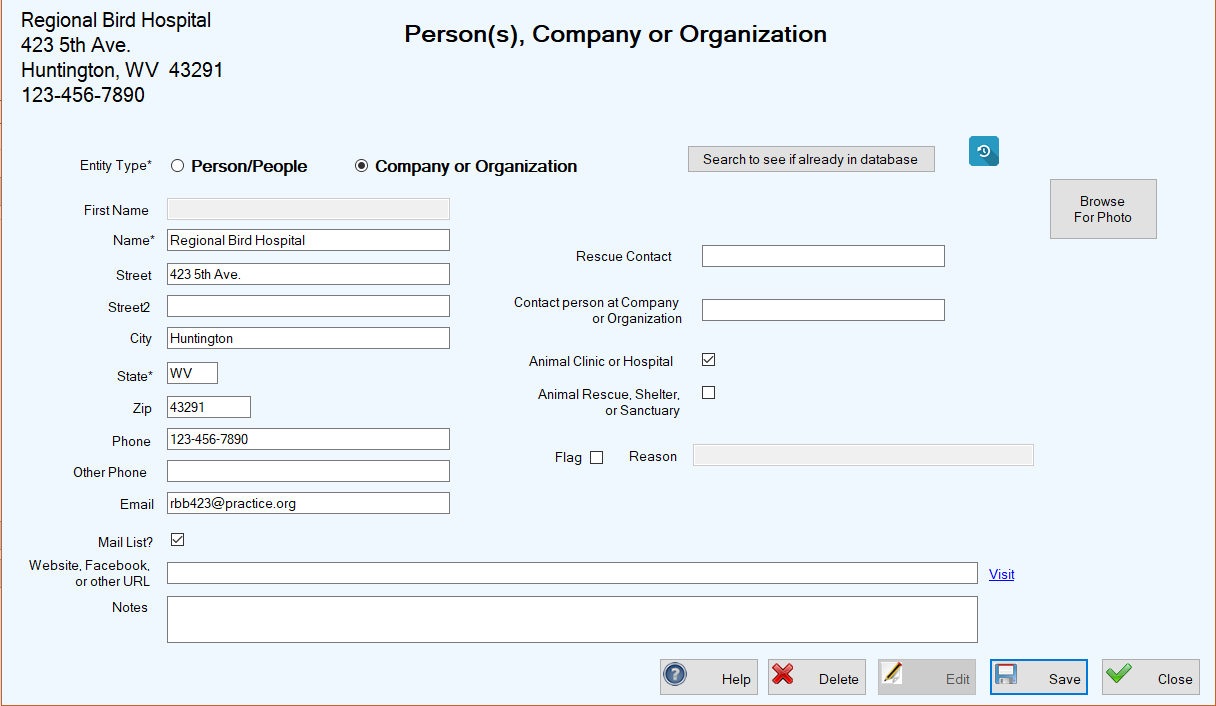
For the Entity Type of Company or Organization, enter information or select the checkboxes for the following items on the right side of the screen:
Rescue ContactPerson at your organization who might have a good relationship with the new PCO and therefore be the best one to make contact with requests for donations and other servicesContact Person at Company or OrganizationPerson at the new PCO to approach with requests for donations, e.g., raffle prizes for an event or financial supportAnimal Clinic or HospitalSelecting this checkbox adds this animal clinic or hospital to drop-down lists for selection on certain screens in the Animal Health section of the application. It also makes the clinic or hospital available for selection when you are adding veterinarians to the database.Animal Rescue, Shelter, or SanctuarySelecting this checkbox adds this rescue, shelter, or sanctuary to drop-down lists for the intake of new animals so you can select it when you indicate the acquisition method is "Other Rescue/Shelter/Sanctuary"and the animal came from this PCO.
-
Select the Flag checkbox only if you want to put this person or organization on a "watch list. Be sure to enter a Reason, e.g., this person should not be on an approved adopters list. Adding a flag causes the record to appear in a different color on the Manage People, Companies, and Organizations screen. (Note: You can define the color for flagged items on the Preferences screen.)
-
Click the Browse for Photo button if you have a photo on your computer that you want to attach to this PCO record.
-
When the Entity Type is Company or Organization, you can enter a URL in the Website, Facebook, or other URL field.
-
In the Notes field, you can enter any other important information you want to remember about this PCO that might be useful in the future. For example, if the record is for an individual, you might want to note any volunteer interests they have expressed.
-
Click Save when you have completed your entries.
-
On the TYR Home screen under Modules, click the People, Companies, and Organizations button. The Manage People, Companies, and Organization screen opens.
-
Click the Add Multiple PCOs (
 ) button. The Multiple PCO Entry screen opens.
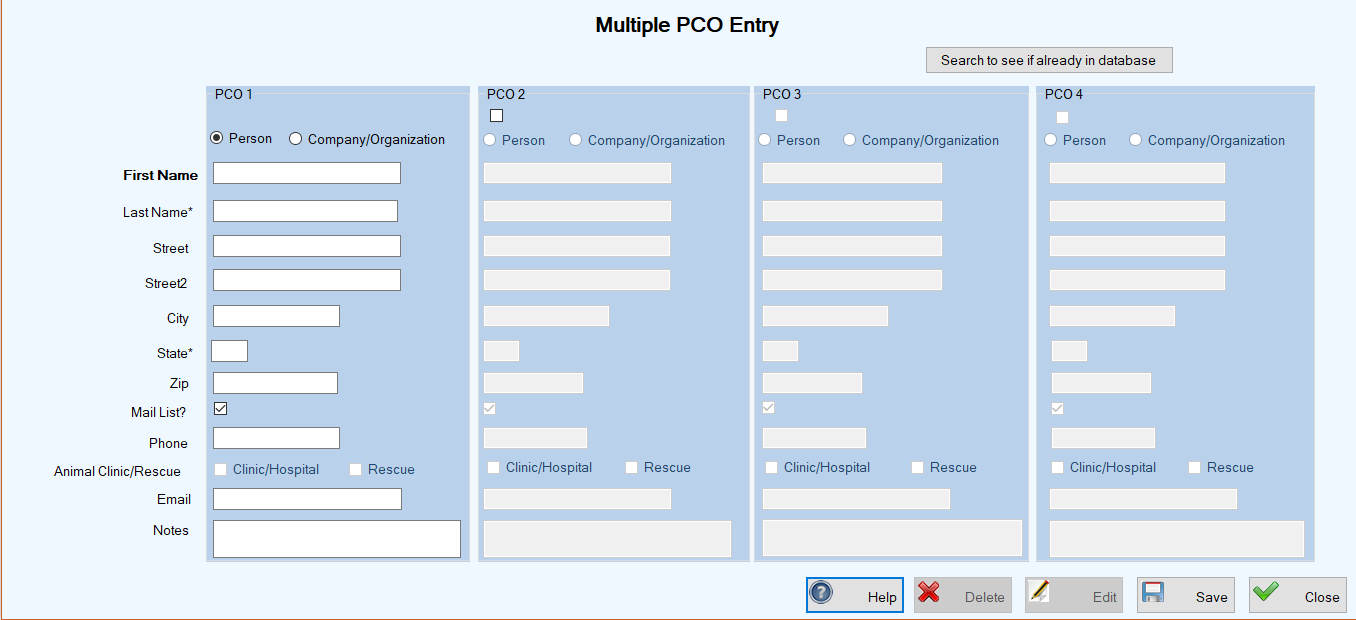
This compact screen eliminates seldom-used fields that appear on the Person, Company, or Organization screen above, thus enabling you to create up to four new PCO records on this one screen.
Note: Only the fields for PCO1 are active for data entry when the screen first opens. To activate the fields for PCO2, PCO3, and PCO4, simply click the checkbox at the top of that section.
-
Follow Steps 3 through 10, 14, and 15 above to complete the fields, applying only the bottom two rows of the table in Step 10.
Top of page
-
On the Manage People, Companies, and Organizations screen, double-click the cell at the farthest left on the row in the grid containing the PCO record you want to edit. The Person(s), Company or Organization screen opens, with all fields available for editing.
-
On the Manage People, Companies, and Organizations screen, click the cell at the farthest left of the row containing the entity you want to delete.
-
Click the Delete button. The system will respond in one of two ways:
(a.) If there are no other records associated with the PCO record, you will see this confirmation popup window:
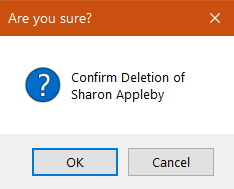
Click OK. You will be returned to the Manage People, Companies, and Organizations screen where your deleted PCO record has disappeared from the center grid and a confirmation message appears in the lower left corner.
(b.) If there are other records associated with the PCO record, the Delete PCO screen will appear, showing a list of all associated records:
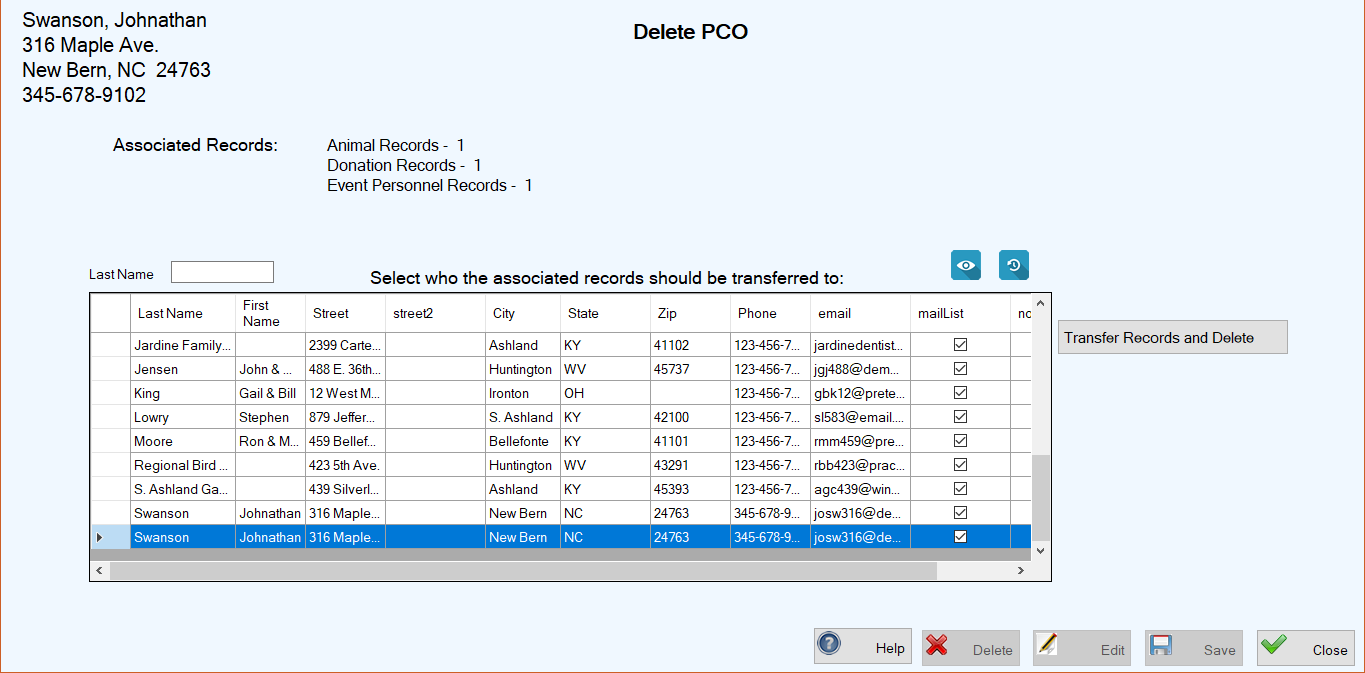
Important Note: Associated records must either be transferred to another PCO record or deleted before you can delete a PCO record. If you have no other PCO record to which you want to transfer the associated records, you must first find and delete all other record associations (Animal, Donation, Event) before you can complete the deletion.
In the image above, the deletion is taking place because someone had mistakenly added a duplicate PCO record for Johnathan Swanson. Therefore, it is advisable to transfer the associated records to the other PCO record for Johnathan Swanson. To do that:
-
Select the PCO record to which you want to transfer the associated records by clicking the cell at the farthest left on the row in the grid.
-
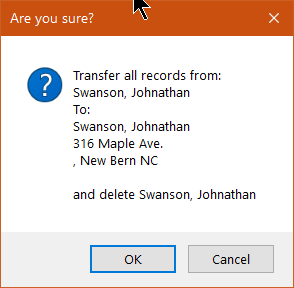
Click the Transfer Records and Delete button. A detailed confirmation popup window appears:
-
To complete the deletion, click OK. You are returned to the Manage People, Companies, and Organizations screen where the duplicate PCO record no longer appears in the grid and a confirmation message appears at the lower left.